The Beginner’s Guide to Yield Farming on Solana

Yield farming has been a hit on the Ethereum network. People have seen great rewards on it and some people have actually made quite a living out of it. But like for most other activities in the decentralized finance (DeFi) space, people are looking for alternative blockchains to do yield farming on.
The Ethereum blockchain is infamous for the ever-increasing GAS fees and its network congestion. While enthusiasts still choose to stick to the Ethereum network, the investors are seeing shrinking profit margins. This is forcing many of them to diversify their investments.
Solana brings in lower network congestion, lower transaction fees, and scalability to the table. All these make it the preferred breeding ground for yield farming. So here’s all you need to get started with yield farming on Solana.
Before we get into it, let’s take a quick look at everything you’ll find in the article:
- What is Yield Farming?
- What is Solana?
- How does yield farming work on Solana?
- Create a Sollet Web Wallet
- Transfer tokens to your Sollet Web Wallet
- Put the tokens in your favorite yield farm
With that out of the way, let’s jump right into it!
What is Yield Farming?
When you're just starting out, terms like yield farming can really throw you off. The explanations available online don't help much either. More often than not, all they do is confuse you further.
Fret not, I use a simple analogy to explain it. I'm sure it would be something you can relate to quite easily.
Let's talk about it.
To start with, the analogy I use is of farming as we know it. You know, the kind that involves seeds, water, and a whole lot of hard work.
How does that work?
You take some seeds and sow them in the soil. After that, it's all about how you take care of the seeds. You need to water the seed every now and then and give it an ample amount of sunlight to grow into a plant.
But you and I, we're not farmers. The best we can do is probably grow some cherry tomatoes in our backyard garden. Sure, it takes some nurturing to get them to grow into healthy plants, but it's still pretty doable.
When it's time to harvest the plant, all it takes is a few plucks and you're good to go. If you have enough of them, you can even sell them off in the farmer's market for a profit.
Yield farming works in a similar way—the difference being that it is a lot easier. It doesn't even call for much of your attention. All you need to do is buy some cryptos (or use some that you already have) and lock them in a farm. Finding the perfect farm can be quite some work but it is quite a rewarding process.
What is Solana?
Solana is one of the most innovative blockchain projects out there. It is an open-source project implementing a web-scale blockchain. In Solana's own words:
"The goal of the Solana architecture is to demonstrate there exists a set of software algorithms that when used in combination to implement a blockchain, removes software as a performance bottleneck, allowing transaction throughput to scale proportionally with network bandwidth."
The Solana blockchain facilitates secure, scalable, and lightning-fast decentralized marketplaces and apps.
In the state the project currently is, it boasts of supporting 65,000 transactions per second (TPS) with a block time of 400ms. This isn't even the upper limit of the network's capabilities. On a standard gigabit network, the system can support up to 710,000 TPS. This is considering that there are no transactions upwards of 176 bytes in size.
If you're using it on a 40-gigabit network, you can see an impressive 28.4 million TPS!
It uses a distributed system technique called Optimistic Concurrency Control. This technique says that a centralized database can replicate itself while maintaining high availability and not compromising much on the transaction rate.
On an adversarial network, the Solana blockchain shows that the same theoretical limits apply to it. Given that time-sharing is done the right way when nodes don't trust one another. Instead of trusting each other, the nodes trust time instead.
The 40-ish years of research done in the field of distributed systems are finding their use in the blockchain industry.
How does yield farming work on Solana?
Yield farming on Solana is pretty similar to how you would do it on Ethereum or even the Binance Smart Chain. It’s a simple 3-step process: create a wallet, transfer tokens to wallet, and lock tokens in a farm.
That’s all it takes for you to go about doing yield farming on the Solana blockchain. Let’s take a deeper look at each!
Create a Sollet Web Wallet
Creating a Sollet Web Wallet is an easy process. It takes no more than a few minutes to set it up and start using it.
To start with, you need to head over to sollet.io. This is the official website for the wallet. Landing on the website, you would see a screen similar to the one that has been shown in the screenshot below.
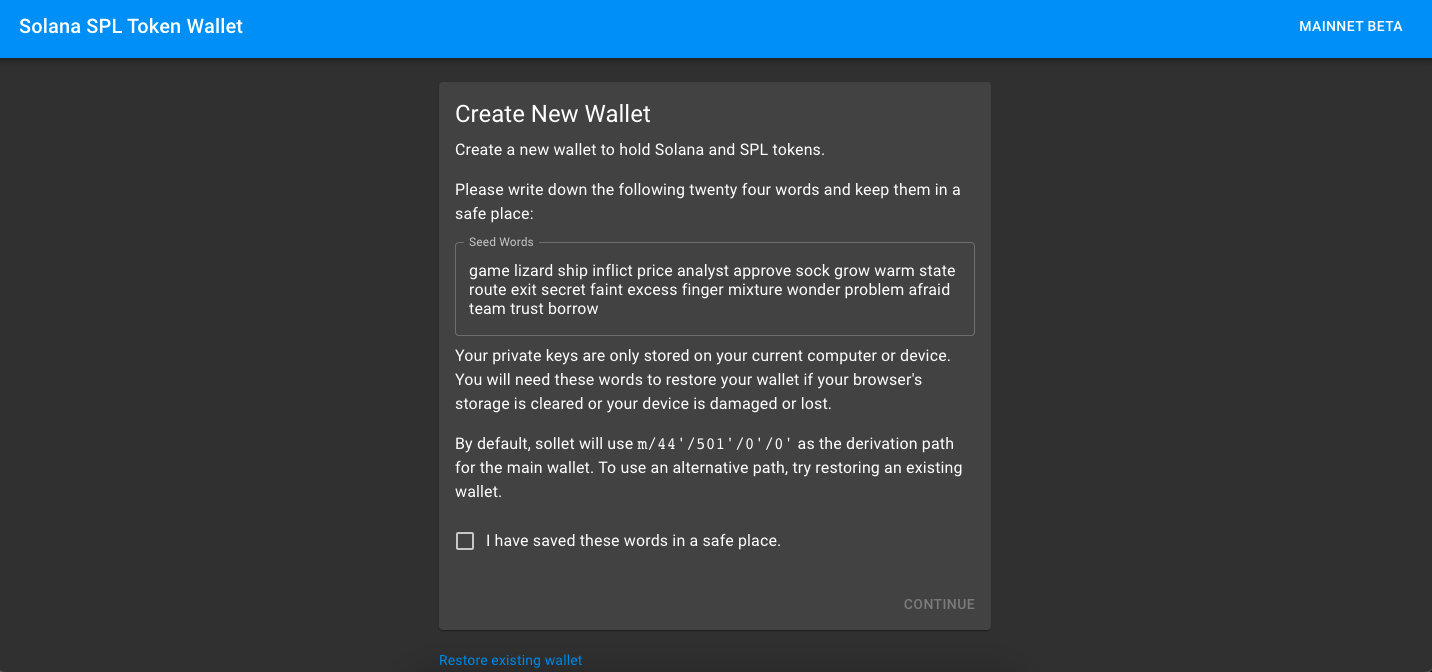
See the box that says “seed words”? Take notice of this box since it contains perhaps the most important part of your wallet—your backdoor into your wallet. These seed words (also known as seed phrases or mnemonic codes) are a set of words that you need to access your wallet.
Luckily, you don’t need to memorize them. Back in the early days, the list of words used to be huge but things have changed and you can now get by with as few as 12 words. Oh, and you had to write these numbers down.
Now, you can choose to either note them down with a pen and paper or store it on some device. Having a hardware wallet certainly helps but for now, feel free to write it down on multiple sheets and store them in different locations. This would be pretty useful if you somehow end up destroying any copy.
Keep one of these copies handy since you’ll be needing it pretty soon.
Once you have the seed words stored safely, feel free to click on the tick box at the end of the page that says “I have saved these words in a safe place.” and hit the Continue button.
Clicking the Continue button would open up a popup much like the one shown in the image below. This is where the copy I asked you to keep handy would help. You need to re-enter your seed phrase. This is something wallets do to ensure that you have indeed noted the seed words down.
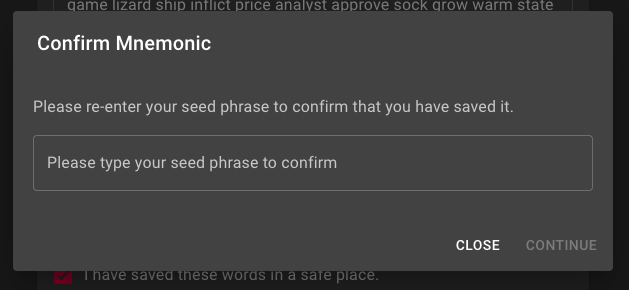
Once you’ve written the seed phrase down, it is time for you to hit the Continue button and move on to the next step. You can stow the sheet of paper with the seed phrase away now.
On the next screen, you would be asked to set a password for your wallet to protect it further. Not only does this safeguard your wallet but also ensures that you’re the one accessing your wallet in the future.
That said, it is completely optional and you are free to skip this step. I would, however, strongly recommend you to set a password (it doesn’t hurt!) and then create your Sollet Web Wallet.
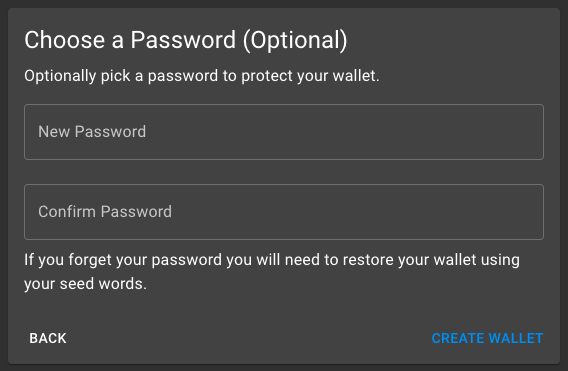
If you’ve chosen to set a password, you need to enter and confirm it here. That said, entering the password shouldn’t be a reason for you to discard your seed words. They’re really important when you need to recover your wallet. The password is just an additional layer of security but the seed words are vital for accessing your wallet.
And finally, you’re free to hit the Create Wallet button. And voila! Your Sollet Web Wallet has been created.
You can now pat yourself on the back and start using the wallet.
Transfer Tokens to your Sollet Web Wallet
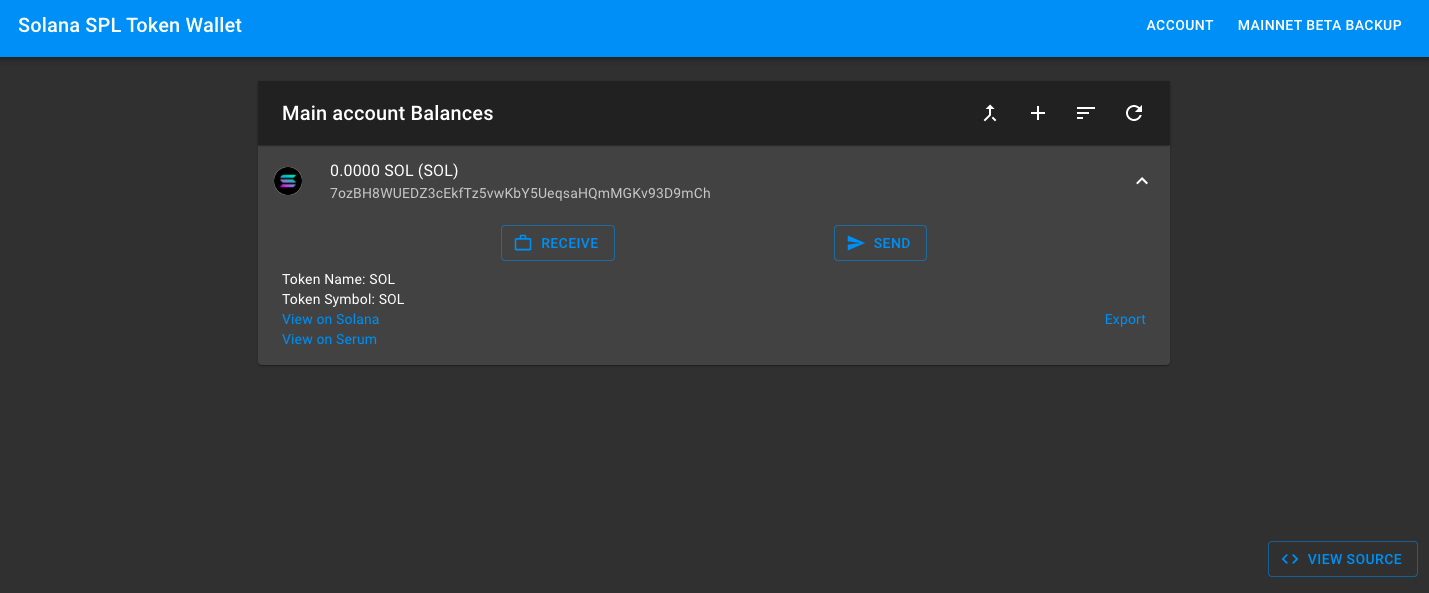
Once you have the wallet set up, you would notice that it is empty. An empty wallet is a dead wallet. So let’s put some SOL into it (see what I did there?)
If you already have SOL, you can simply hit the Receive button. Doing so would open the window you can see in the screenshot below. As you can see, it shows your wallet address on which you can send the SOL tokens. You could alternatively hit the QR button to generate a QR code and use that instead.
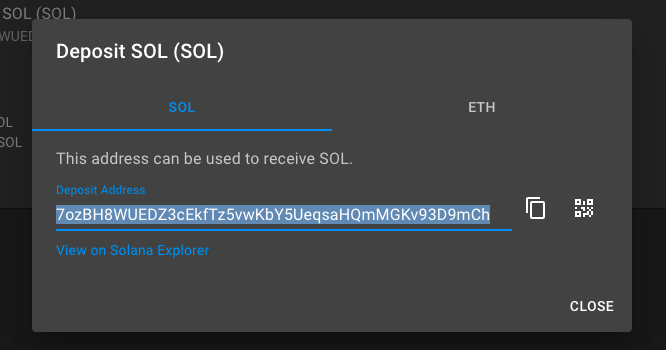
But what if you don’t already have SOL handy? You have two options to go for. Either you could buy it from exchanges like FTX and Binance. Or you could use the ETH you already have on your MetaMask wallet and convert that into SOL.
If you choose to go for the second route, switch to the ETH tab in the same window and connect your MetaMask wallet. And then transfer the amounts of tokens you need. Of course, you need to pay some GAS fees for it, but it wouldn’t cost you an arm and a leg.
Once you have some SOL (okay, this is the last time I’m making this joke) in your Sollet Web Wallet, you’re free to use it for yield farming.
Put the Tokens in your Favorite Yield Farm
Putting the tokens in a yield farm is pretty easy. The first step is to add liquidity to an X-SOL or SOL-X liquidity pool, with X being any token. Doing so, you will be rewarded with SOL-X LP or X-SOL LP tokens. These tokens can then be locked in a yield farm to get some yield out of them.
I understand if you find this a bit vague, but don’t worry, this is the general process. To get into the specifics, we’re going to take a look at how yield farming is done on Raydium.
Built on the Solana blockchain, Raydium is an automated market maker (AMM) with plenty of cards up its sleeve.
In Raydium’s own words, it “leverages the central order book of the Serum decentralized exchange (DEX) to enable lightning-fast trades, shared liquidity and new features for earning yield.”
For yield farming on Raydium, you need to first head over to raydium.io, which is the official website for the platform. Out here, click on the Launch App button which would take you to the Swap section.
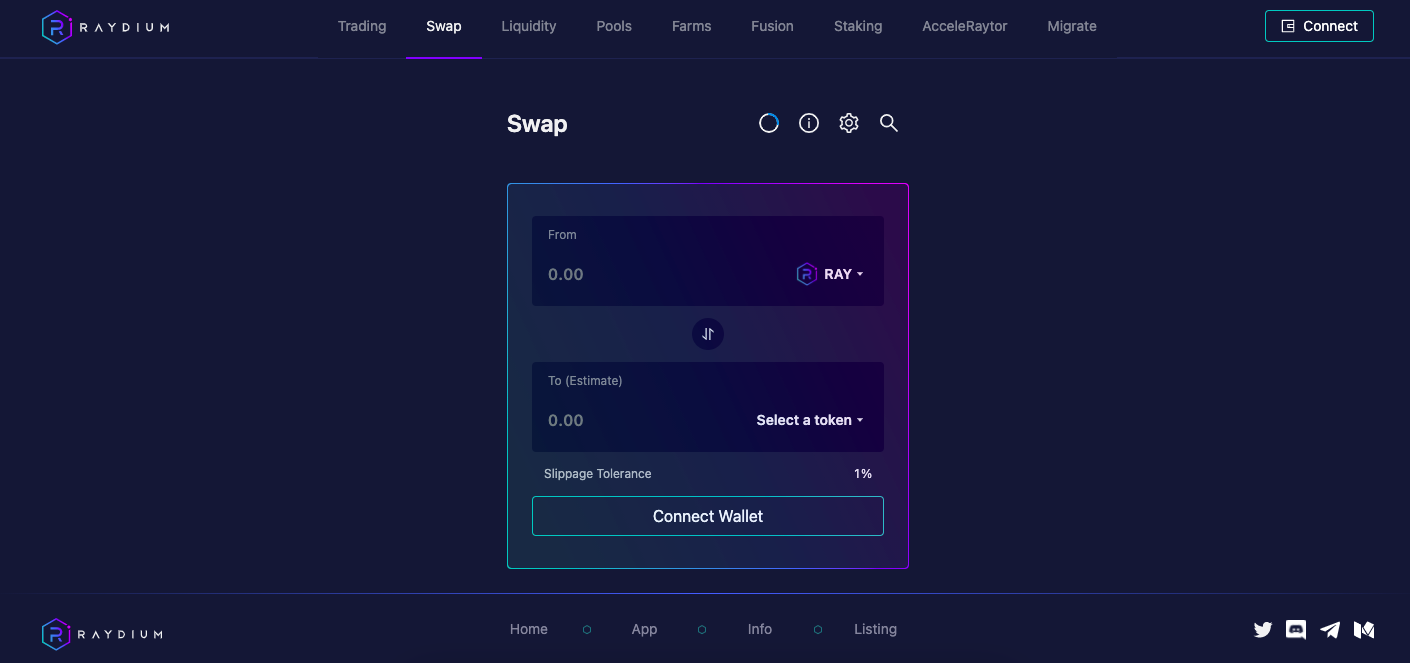
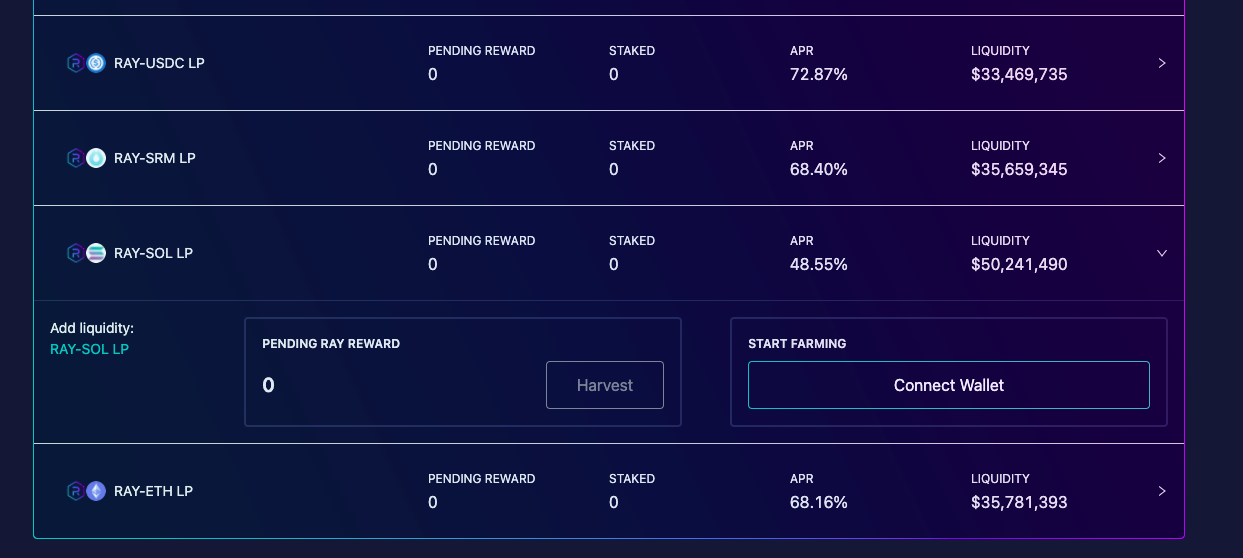
This isn’t where you need to be. So head over to the tab that says “Farms”. You should be seeing a screen similar to the one in the screenshot below.
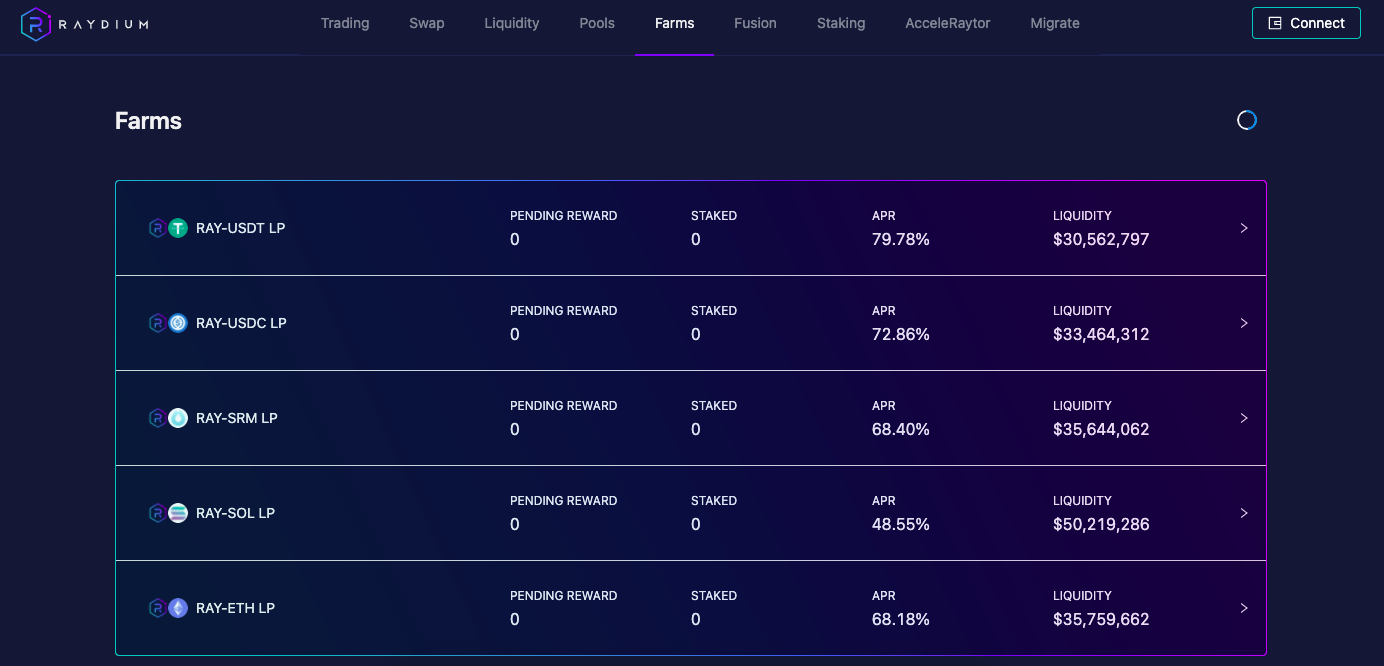
Out here, you can see all the farms that are active on the platform. For this example, we’re interested in the RAY-SOL LP farm so that’s what we’ll click on. Upon clicking, you would see the section expand and you would see something similar to the screenshot below on your screen. Click on the RAY-SOL LP right below “Add liquidity.”
This would take you to the Liquidity tab where you can add liquidity to the RAY-SOL liquidity pool. Connect your wallet and feel free to add liquidity to the pool. Now, you have SOL tokens, but no RAY tokens, right? You can always use the Swap tab to swap some of your SOL tokens for RAY tokens.
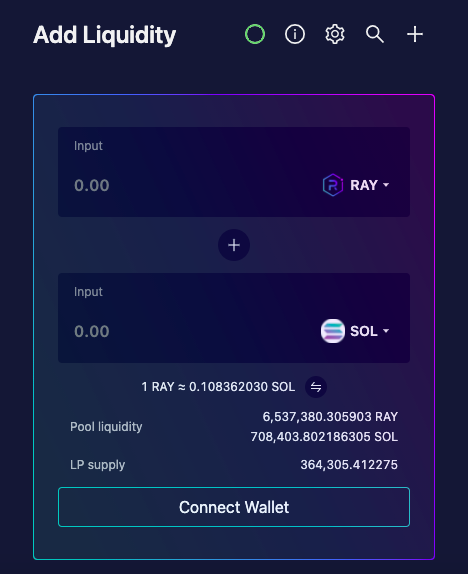
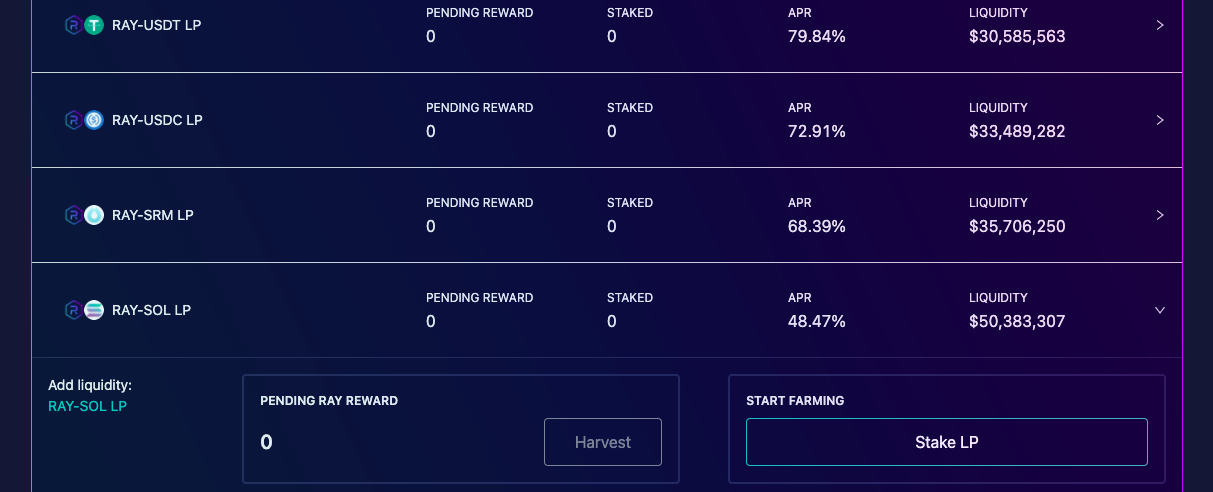
Once you’ve added liquidity, you would have some RAY-SOL LP tokens which you can then stake by clicking on the Stake LP button.
And that sums up the entire process of yield farming on Raydium, and by extension, the Solana blockchain.
Before you go…
The Solana blockchain has a lot of opportunities for yield farming and deciding between the different platforms could be a hassle.
Now that you know the basic steps for reaping the benefits of yield farming on the Solana blockchain, you should definitely try it out. But, before choosing a specific yield farming platform, make sure that you’ve done due research.
As for what the future holds in store for the yield farming industry on the Solana blockchain, that is something only time will tell.